For homebrewers, chilling wort down to pitching temperature is one of the final steps of a long brew day. The faster the wort cools, the sooner you’ll be able to relax after a long day’s work with a nice, cold homebrew.
Wort chillers are an essential piece of equipment to ensure an efficient brew day. On top of that, chilling helps clarify beer and reduce the risk of off-flavors. The best chiller for homebrewers is the MoreBeer WC45A Immersion Chiller because it’s efficient, affordable, and easy to use.
Wort chillers come in three main types: immersion, counterflow, and plate. We’ll take a look at the top chiller in each category and help you make the best purchase for your home brewery.
MoreBeer WC45A Immersion Chiller
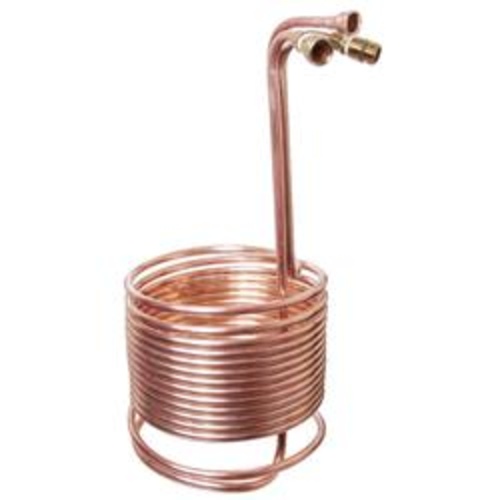
This Immersion Chiller has a recirculation arm soldered to MoreBeer's popular WC45 SuperChiller, making their best-selling chiller even more effective.
Well built, heavy duty, and very easy to use, the MoreBeer WC45A Immersion Chiller gets your beer chilled with ease. With 50 feet of ½” copper tubing, this chiller has a massive amount of contact with wort – meaning quick and efficient chilling.
The WC45A is the best immersion chiller for homebrewers. In fact, it’s the best chiller for homebrewers, period. We highly recommend the WC45A.
Features:
- Material: copper
- Dimension: 50′ total coil length x 1/2″ outer diameter tubing
- 12” diameter coils
- Chills 5 gallons in 15 or 20 minutes
- Standard garden hoses fittings on the inlet and outlet
- Fits most 5 to 30 gallon kettles
| Pros | Cons |
| Great for large batches | High price |
| Solid build quality and tight fittings | Not suitable for smaller kettles |
| Easy to clean and sanitize |
Where to buy: MoreBeer
NY Brew Supply W3850-CV Immersion Chiller
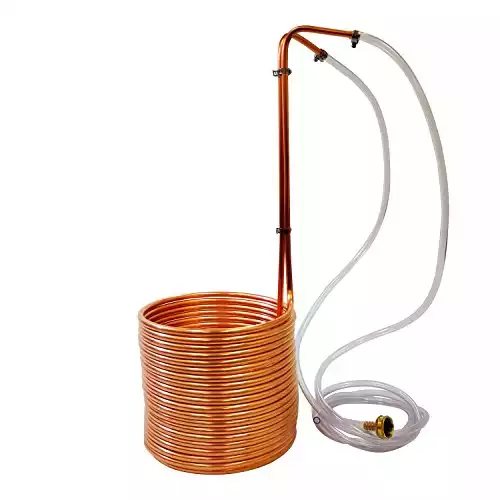
This efficient immersion chiller is recommended for 5-15 gallon batches and is made from 50 ft of 3/8" O.D. copper tubing.
For an entry-level wort chiller that is reliable and practical, look no further than the immersion chiller from NY Brew Supply. The W3850-CV has 50 feet of 3/8” copper tubing which is enough potential cooling capacity to please the majority of homebrewers.
Features:
- 50′ copper tubing
- 24″ overall height
- 9″ coil diameter, 8″ coil height
- 12’ of vinyl tubing and high quality brass hose adapter included
- Hose clamp fittings between coil and tubing
| Pros | Cons |
| Price | ⅜” copper bends easily |
| Compact size | Weaker hose clamp fittings |
| Easy to clean and sanitize |
Where to buy: Amazon
Exchilerator Maxx Counterflow Wort Chiller
The Exchilerator uses Pex tubing and a 10 gauge nonmetallic wire woven in a co-helical manner around inner copper tubing.
The Exchilerator Maxx Counterflow Wort Chiller is extremely efficient and built like a tank. This counterflow chiller is practical and easy to use and has an in-line thermometer that shows the temperature of the wort at the outlet. This is the best counterflow wort chiller on the market today.
Using either gravity or a pump, wort is transferred from the brew kettle through the chiller into the fermenter.
Features:
- In-line thermometer
- 25’ copper tubing with 3/8” diameter
- PEX plastic shell
- High quality, leak-proof fittings
- Option for stainless steel
| Pros | Cons |
| In-line thermometer | High price |
| Very well built | Difficult to clean and sanitize |
| Extremely fast chilling | Pump may be needed |
Where to buy: Amazon
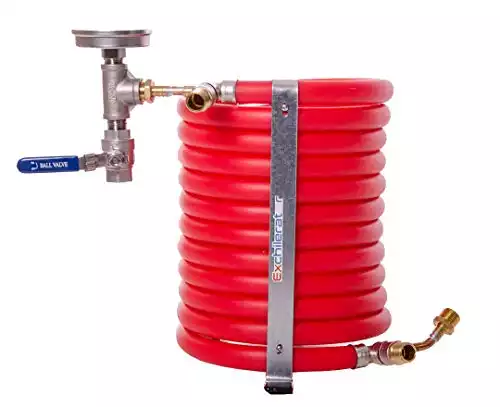
Kegco Stainless Steel Counterflow Chiller
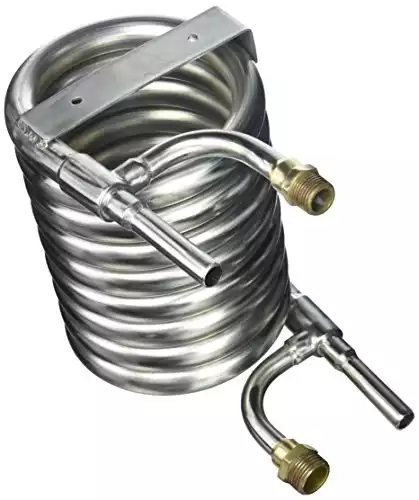
Chill your wort twice as fast as a standard immersion chiller with Kegco's ingenious and water-efficient Stainless Steel Counterterflow Chiller.
If you’re looking for an all stainless steel chiller, the Kegco Stainless Steel Counterflow Chiller has got you covered. Its compact design is meant to be used with a pump to get maximum efficiency. Stainless makes it easy to clean and it looks amazing with a professional quality build.
Features:
- 12′ of 5/8″ 304 grade stainless steel tubing
- Stainless steel outer shell
- Dimensions: 10-1/4″ high and 6″ in diameter
| Pros | Cons |
| All stainless steel design | Needs pump for operation |
| Compact size | |
| Clean and professional build quality |
Where to buy: Amazon
Blichmann Therminator
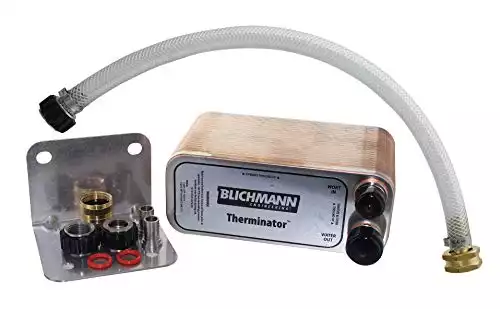
The Blichmann Therminator has 40, 316 stainless steel plates and fittings for faster cooling.
You can always expect top quality from Blichmann – at top price, of course. This tiny, but ultra-efficient, plate chiller is the best of its class for homebrewers. With its very low flow resistance, the Therminator can be used with gravity or a pump.
Features:
- All 316 stainless steel plates and fittings
- Small size: 7.5″ wide x 4″ deep x 3″ high
- Optional in-line thermometer and in-line oxygenation kit
Pros | Cons |
| High efficiency | High price |
| Extremely fast | |
| Very compact | |
| Sanitize by boiling |
Where to buy: Amazon, MoreBeer
HFS(R) Homebrew Beer Wort Chiller
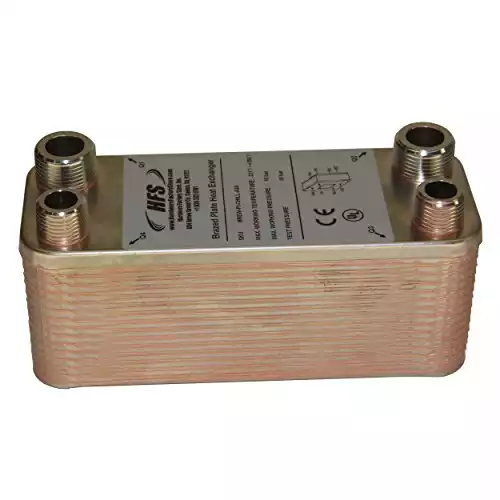
This HFS Plate chiller is made of high-grade 304 stainless steel and brazed with 99.9% copper for superior heat exchange performance in a simple effective design.
The HFS(R) Homebrew Beer Wort Chiller is a great option for an affordable, yet good quality chiller. Made from 304 stainless steel, with 30 plates, the HFS(R) will chill wort quickly using a wort pump.
It comes with threaded NPT fittings but not much else. You’ll need to buy the accessories to attach to the water and wort tubing at the hardware store.
Features:
- 304 stainless steel design
- Dimension: 7.5” x 2.9”
- 3/4″ x 1/2″ NPT fittings
| Pros | Cons |
| Good price | Need pump |
| Stainless steel construction | Minimal accessories included |
Where to buy: Amazon
What is a wort chiller
A wort chiller quickly cools wort from boiling to yeast pitching temperature. Wort is boiled to sterilize and add bitterness. Since wort boils at pretty much the same temperature as water, 212F, cooling without a chiller can take a long time. Yeast can only be pitched when the wort is cool, around 70F. Adding yeast to hotter wort can cause off-flavors or straight up kill the yeast.
Wort chillers are based on the principle of heat transfer. Cold water is flowed through the chiller and indirectly exposed to hot wort. This exchange of heat cools down the wort and, in turn, warms up the water through thermal conduction.
For homebrewing, there are three main types of wort chillers: immersion, counterflow, and plate.
Immersion
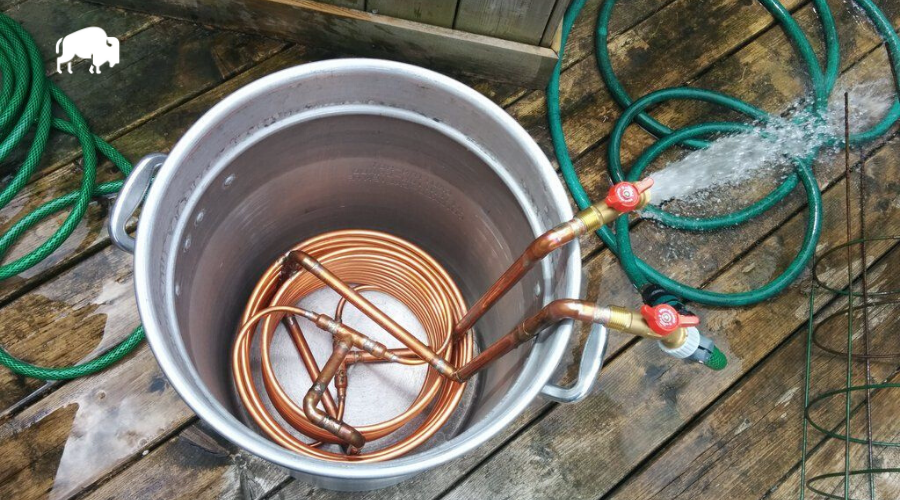
Immersion chillers are the most common style of wort chillers for homebrewers. They are the least expensive, simplistic in design, and made from coiled tubing, in either copper or stainless steel. The coil is immersed directly in the wort and cold water is run through the tubing. Heat transfers from the hot wort to the cooler water along the length of the coil’s tubing – usually between 25 and 50 feet long.
Immersion chillers are easy to sanitize by submerging in boiling wort for the final 15 minutes of the boil. Cleaning is also a breeze as they can be easily hosed off.
On the downside, immersion chillers work slower than both counterflow and plate chillers. Expect at least 10 to 15 minutes longer to chill 5 or 10 gallons of wort. Also, if you use an electric brew kettle with an internal heating element, you may get some interference with the element and the chiller.
Counterflow
Counterflow chillers work by passing wort through a long coil while cold water flows in the reverse direction. Counterflow heat exchange is an extremely quick and efficient method to cool down wort.
Wort can be drawn through the coil using either a pump or gravity. Using a pump, you can easily control flow rate and place your counterflow chiller at any height relative to the boil kettle. For a gravity fed operation, the chiller needs to be below the kettle.
As the wort passes through the coil, it gradually cools, and flows through the outlet of the counterflow chiller directly into a fermenter.
When it comes to cleaning and sanitizing, counterflow chillers need special attention. Hot wort can be run through the chiller near the end of the boil and recirculated to ensure sanitation. Unlike immersion chillers, you can’t see all the internal surfaces the wort touches. Always be careful and thorough in your sanitation steps to avoid any potential contamination.
Counterflow chillers may also tend to clog when brewing hoppy beers. Make sure to use a hop spider or bazooka screen to filter out hop particles.
Plate
Plate chillers are standard in most commercial breweries. Rectangular shaped and compact, plate chillers use a series of cascading metal plates to transfer heat from hot wort to cold water.
At the homebrew scale, plate chillers are a great option to get your wort chilled fast due to the large surface area of the cooling plates.
Like counterflow chillers, you can run a plate chiller using either gravity or an in-line wort pump.
Plate chillers can also be difficult to clean and sanitize. Most brewers sanitize their plate chiller in the same way as a counterflow chiller. Many plate chillers, however, can be boiled in water to sanitize which is a quick way to make sure it’s sterile.
Clogging is also an issue for plate chillers. Like counterflow chillers, hops should be filtered when leaving the kettle.
What to look for in a wort chiller
With the variety of options on the market, figuring out what makes the best chiller for your specific home brewery can be confusing. Here are the main things to look for when making your decision.
Material
For immersion and counterflow chillers, copper is a great material because it’s highly conductive. This means more efficient cooling time. Plus, copper adds an important nutrient to wort – zinc – which helps promote healthy fermentations.
Stainless steel coils are also available at a higher price. Some homebrewers prefer stainless for its durability and corrosion resistance. However, they are slightly less efficient.
Stainless steel is always used for plate chillers for corrosion resistance and manufacturability.
Quality
Like all brewing equipment, a good quality product will last you a long time and will cause you fewer headaches. Fittings should ideally be brass or camlocks and tightly fitted. Hose clamps are often used, but these are a cheaper fitting and can cause leakage. You want to make sure the fittings are secure and the seals don’t leak. Any water getting into your freshly boiled and sterilized wort could cause a potential contamination.
Accessories
Chillers are not always sold with all necessary accessories. Fittings, tubing, and even a pump may be needed to get your chiller up and running. Most homebrewers connect their chiller with standard garden hose fittings which can be found in any hardware store. Double check what’s included before making a purchase to ensure you have all the required components on your brew day.
What are the benefits of using a wort chiller
Save time
5 or 10 gallons of 212F wort has a lot of thermal mass. Without help, getting the wort down to acceptable pitching temperature can take a long time. A wort chiller gets the temperature to where it needs to be between 10 and 25 minutes.
Cold break
A quick chill helps coagulate proteins in the wort, allowing them to precipitate to the bottom of the boil kettle or fermenter. This helps eliminate chill haze in finished beer, ensuring a clear and crisp pint.
Don’t worry if you’re a hazy IPA brewer – you’ll still get plenty of haze from all those juicy hop oils.
Minimize risk of infection and off-flavors
During the chilling process, wort enters into a temperature range – between 80F to 140F – that’s optimal for bacterial growth. If a wild microbe were to get into the wort, the warm temperature could accelerate growth, causing an infection in your beer.
Further, a quick chill minimizes the potential formation of DMS – dimethyl sulfide – which leaves beer with a vegetal, corn like taste. Not good. Chilling quickly is a great way to eliminate this risk.
Final Thoughts
Wort chillers are an essential piece of homebrewing equipment. Quick and efficient chilling speeds up your brew day and helps increase the quality of your beer. We recommend the MoreBeer WC45A Immersion Chiller for a high efficiency immersion chiller at a reasonable price.
If you prefer a counterflow or plate chiller, you can’t go wrong with either the Exchilerator Maxx Counterflow or the Blichmann Therminator. Both chillers will cool your wort quicker than you can open a pack of yeast!
Whichever option you choose, you can be sure your wort will be chilled quickly so you can chill out with a cold beer after a successful brew day.
Frequently Asked Questions
How can I chill faster?
When brewing 5 or 10 gallon batches, you can expect the wort to go from boiling to yeast pitching temperature (about 70F) in 10 to 25 minutes. Depending on your ground water temperature, this might take a bit longer.
Your source water might be too warm to efficiently cool the wort. In this case, consider using a pre-chiller. Between your water source and wort chiller, you can connect an immersion chiller that is immersed in a cooler of ice water. This ensures that the water entering your wort chiller is icy cold and will dramatically speed up your chilling.
Another tip for immersion chillers is to move the coil around in the wort during the chilling process. This helps speed up the chilling time by allowing more of the hot wort to contact the chiller coil directly.
What type of wort chiller should I go for?
We’ve outlined the three types of chillers available for homebrewers: immersion, counterflow, and plate. The choice of chiller type really depends on your brewing system.
We recommend immersion chillers for the majority of homebrewers. They’re affordable, easy to clean, and straightforward to use.
Plate and counterflow chillers chill faster but they’re typically more expensive and require extra care. Cleaning and sanitization are more difficult. Plus, you usually need a kettle with a valve and pump.
Feel free to reach out to us if you have any specific questions or would like some guidance on choosing the best chiller for your particular system.
Can I build my own chiller?
Yes! Many homebrewers opt to build their own DIY immersion chiller. There are plenty of online tutorials that can guide you. And you don’t need to be an expert handy-person to build one either. You can find most components at your local hardware store. You’ll need a copper pipe bender to properly coil the copper, but otherwise most tools are standard.